Firmware and creation of the PLC software environment for the ARM architecture
Widespread in embedded solutions the ARM architecture obtained due to its relatively high productivity coupled with low power consumption and cost. In order to perform planed task to provide the hardware multiplatform the OpenSCADA system was adapted to the building and operation on the equipment of ARM-architecture. Thus, the following projects were made Building the OpenSCADA project for the mobile devices of the Nokia company (N800, N900, N950) and Building the OpenSCADA and firmware for the ARM-based controllers from ICP DAS (LP-5141). The purpose of this section is to systematize the procedures and track he problems of creating the OpenSCADA buildings and software environment firmwares as a whole for a variety of embedded ARM-architecture hardware.Specific of the ARM architecture is the lack of a necessarily hardware-dependent software system of the basic initialization and configuration of equipment, which is characteristic for the x86 architecture — BIOS, and the structure of hardware configuration typically includes: CPU, integrated operational and flash memory, as well as a number of built-in equipment on a standard system-level buses. The flash and RAM are placed in general address segment. Initialization of the such system with the software environment is made by downloading executable code directly on the built-in flash-memory.
To working of computing functions of OpenSCADA and other related libraries and softwares the performance of floating point calculations is very important. Specific of the ARM architecture processors is the ease of its core and availability of optional extensions such as math coprocessor. As a consequence, the performance on floating point operations is highly dependent on the specific processor, and on the emulation type of the floating point coprocessor if it is absent at all. There are two formats of floating point in the ARM-architecture processors: FPA and VFP. FPA format is obsoleted and met as a hardware implementation in the ARM cores up to the StrongARM family (ARMv4). XScale ARM core families (ARMv5TE) did not have a math coprocessor at all. And the ARM core, starting with the ARM11 family (ARMv6) are equipped with VFP format math coprocessor. At the same time the ARM processors with the ARMv5 architecture are still widespread, and thus the question of performance of mathematical calculations for them comes down to the performance of the FPA or VFP format emulation. In the case of the Linux environment the emulation of FPA is usually done by the Linux kernel by the CPU exceptions handling when calling FPA commands. Software emulation in the math library is usually found with the VFP format which requires the rebuilding of all programs. The FPA emulation by means of exceptions is much worse than the performance of software VFP emulation. You can compare the performance of floating-point calculations on different architectures, processors and ways of emulation in appendix 1.
The typical software environment based on the Linux operating system for ARM based hardware is: Loader UBoot, Linux kernel and root file system (RFS). UBoot loader is loaded into the zero sector of flash memory, and its settings are stored in the first one. From the second sector the kernel code is loaded, and immediately after it - the RFS. RFS is usually uses as basis the JFFS2 or UbiFS file system, which are optimized to work on block devices — flash memory with a limited resource of records. Examples of partitioning a block device (flash memory) for LP-5141 and TionPro270 are presented below:
The root file-system contains a typical UNIX-tree with work programs, libraries and other files. The basis of any program or library are the system libraries GLibC or UClibC. OpenSCADA is adapted for building and operating with "GLibC" version >= 2.3. "UClibC", created as a lightweight version of "GLibC" for embedded systems, contains a number of limitations and has not yet been implemented or has errors in the implementation of a number of functions.
RFS and a software environment based on Linux can be supplied with the ARM-equipment and contain closed binary libraries, Linux kernel modules, etc. In this case, an independent building and replacement of the original software environment is impractical task because it leads to the loss of original functionality. However, it often happens the delivery of the ARM equipment without the source (original) software environment, or with an environment that does not contain closed code and which can be replaced. An example of the first case is the controller LP-5141 and similar of the "ICP DAS" company, which contain the binary building of the specialized equipment API library (libi8k) and Linux kernel modules for its initialization. An example of the second case is a single board computer
Building tools for the Linux kernel and working environments for different target architectures
Linux RFS can be formed on the basis of ready packages of the existing binary distribution, source package of the current distribution, as well as to build from the original sources through the ToolChain in one of the building systems.Building of the programs or of an entire RFS for architectures other than x86 and x86_64, is usually made using the Cross Compilation tools (ToolChain) for building, linking and debugging for the target ARM architecture. To automate this process a number of tools to build the ready RFS created.
 BuildRoot
This building system is a part of the project for creation an alternative library of functions of "C" language UClibC, so basically aims to build environments with "UClibC", and with appropriate restrictions. BuildRoot is well in the work on the host systems of different versions, and allows to build the software environments based on Linux without too much troubles.It is possible to get the BuildRoot archive of the correct version by the link
The build process can cause following problems:
- Inability to download the programs archive.
(+) This package should be downloaded separately and put to the directory "./dl" or "./output/dl".
- Programs' building errors.
(+) There is no single solution to this problem you must to understand the reason of the building of individual programs. Building error may be linked, for example, with the lack of choice of the individual parameter during the configuration or problem building of the software in this environment. Patches and fixes of the building can be placed directly in the directory of the program description "./package/{package name}/"
 PTXDist
Universal tool fro the building of kernel's, ToolChain and software environments based on Linux from the "Pengutronix" company. PTXDist is a powerful and flexible tool, but it's older versions have problems in the modern host systems, which complicates the task of building the software environments for relatively old but still prevalent hardware platforms. For example, now (2012) can be found new hardware with the ARM XScale, ARM9 (ARMv5) processors of the 2003 year. However, newer versions of PTXDist support the old platforms, what can be learned from the support table by the link: To build the software environment (RFS) using PTXDist it is necessary:
- to get the builder's tool archive (along with the next versions projects,
 http://www.pengutronix.de/software/ptxdist/download), compile and install it;
- to get archive of source files (the same or similar version as PTXDist,
 http://www.oselas.com/oselas/toolchain/download) and build ToolChain;
- to clone-create and build the RFS project.
Now detailed, in commands:
 Tion-Pro270
Single-Board Computer "Tion-Pro270" is a highly integrated computational-control system, based on the Marvell PXA270 processor with XScale ARM core from the All materials on building the programming environment with OpenSCADA and ready builds for Tion-Pro270 board can be obtained at:
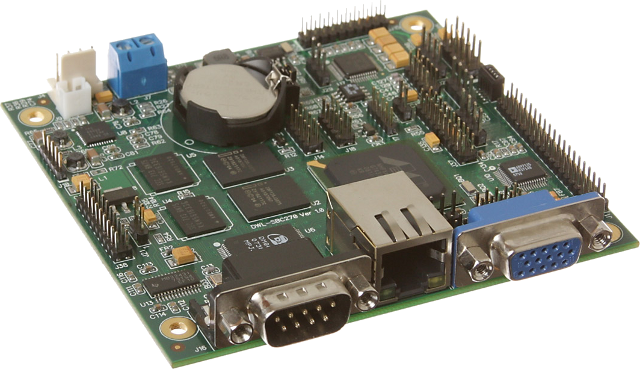
The board is supplied by the equipment manufacturer with preinstalled software environment based on Linux™ or Windows CE©. Besides all the source materials of the software environments are available in
We got the board with the minimal software environment for which it was not possible to build OpenSCADA, so the new software environment has been fully loaded to the board. Download the software environment to the flash-memory was made with the help of JTAG-adapter
For downloading to board's flash memory it was used ready boot buildings
Flashing of the equipment with help of "OpenOCD" was made from root by the following command:
$ openocd -f interface/olimex-arm-usb-ocd.cfg -f tion270.cfg
"tion270.cfg" script of the flash and image files of the software environment specified in the flash script "tion270.cfg", should be placed in the current directory. The flash script "tion270.cfg" includes:
Building of the RFS in the BuildRoot
In order to avoid multiple build problems associated with the build from the beginning, the configuration "buildroot-2009.08" was taken directly from the Git-repository of the equipment manufacturer:Result RFS was loaded to the flash memory of the board and started successfully. However, at start it became clear that the "uCLibs" version 0.9.30.3 does not implement the function clock_nanosleep(), as well as crashes in the function timer_settime() for the type of notification SIGEV_THREAD. The the clock_nanosleep() function can be replaced by nanosleep(), but it is impossible to solve the problem of the timer_settime() function within this version of "uCLibs".
Next, an image of the current version of the "BuildRoot" on 16.01.2012 was taken, and the building of OpenSCADA with "uCLibs" version 0.9.32.1 were made. The building was successful after some adaptation of the building environment. OpenSCADA started successfully with some problems that have been resolved.
Following list describes problems encountered during building and operation of OpenSCADA on uCLibC of different versions:
- There is no implementation of the usleep() and msleep() functions in the typical configuration — it is created and widely used the system-wide function for OpenSCADA sysSleep() with the implementation based on nanosleep().
- < 0.9.32: it can't be built due to the lack of a number of functions, as well as OpenSCADA can't start:
(+) the lack of the clock_nanosleep() function's implementation — it is necessary to use the version >= 0.9.32 or to change it to nanosleep().
(-) 0.9.30.3: crash in the timer_settime() function for the SIGEV_THREAD notification type — Actual.
(-) 0.9.30.3: crash in the timer_settime() function for the SIGEV_THREAD notification type — Actual.
- 0.9.32: building was done successful, with some solved problems when starting the OpenSCADA:
(+) The OpenSSL library "libssl" contains no dependence on the "libcrypto" — the direct dependency on the "libcrypto" library is added to the "OpenSCADA.Transport.SSL" module.
(+) Family of printf() functions incorrectly circumvent the problem of hanging characters '%' — line of the message is fixed "Last: %s. Load: %3.1f% (%s from %s)".
(+) Different from the GLibC processing of the interblocks within a single thread in the RW-lock functions — the interblocking is fixed in the OpenSCADA.UI.WebVision module, and function of sessions' check was moved to the service call procedure.
RFS build in the PTXDist
Learning the PTXDist for building environment on TionPro270 was made using the experience of the following linkBefore the building of RFS the ToolChain configuration for this board was created arm-xscale-linux-gnueabi_tion270.ptxconfig on the basis of the existing arm-xscale-linux-gnueabi_gcc-4.6.2_glibc-2.14.1_binutils-2.21.1a_kernel-2.6.39-sanitized.ptxconfig with the following programs' versions:
- GLIBC_ENABLE_KERNEL="2.6.19", because the actual kernel is 2.6.22 version, and to work with him GLibC should be given less than or equal version;
- KERNEL_HEADERS_VERSION="2.6.30.5", kernel version for the headers;
- CROSS_GCC_VERSION="4.5.2".
Next was created PTXDist "OSELAS.BSP-Pengutronix-Generic" project's clone in directory "TionPro270_RootFS" with the configuration platform "arm-qemu-2011.01.0". To build OpenSCADA following configuration files was created openscada.in and openscada.make, which were placed in the local configuration directory of the project rules/. It was adapted the configuration of the udev program, which version was very big for the original version of the kernel Linux-2.6.22, ie it was used the udev of 141 version. New configuration files of udev were also placed in the directory rules/, thus defining their usage instead of the original configuration.
The RFS was successfully built and jffs2 image of FS was received. The resulting RFS was successfully loaded onto the board and started. OpenSCADA started and work correctly as well.
Adaptation
This board contains a number of hardware interfaces interesting to adaptation for OpenSCADA, so this section will be focused on the adapting process.The board contains a chip converting signal levels from RS232 to RS485, which, however, is not clear to send requests from the software. Namely:
- to send a request you need to set the RS232 interface signal "RTS" at zero;
- it is necessary to read interface for waiting the echo package of the request, after receiving of which the RS232 signal "RTS" should be set to true, the echo package should be dropped and then you should waiting for direct response.
To the specific solve the OpenSCADA module Transport.Serial has been improved for this kind of hardware flow control support.
Using this extension, validation was made and presence of LP-5141 controller's software environment problem was confirmed.
ICP DAS LP-51xx
Firm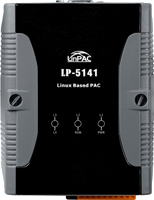
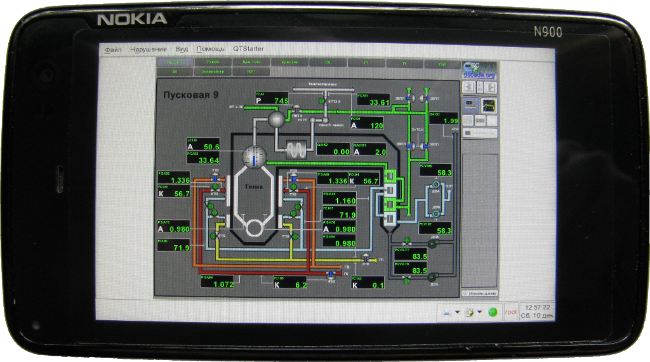
Nokia N800, N900, N950, N9
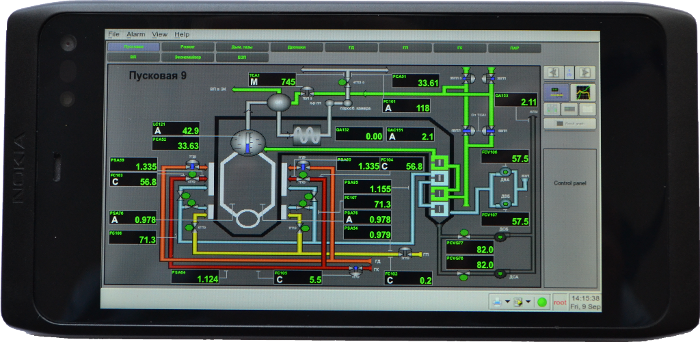
Firm Nokia is one of worldwide leaders into manufacturing and marketing of mobile telephones. Into year 2005 the firm Nokia released the pocket personal computer (PPC) N770 based on featured Linux environment with proper environment of desktop (on GTK+) — Hildon with main the project name Maemo. Later base on the platform Maemo was released yet three mobile devices — two PPC "internet-tablet" N800, N810 and smart-phone "internet-tablet" N900. In 2010 the firm Nokia joined forces to work on the Maemo with the project MobLin of firm Intel, creation the project MeeGo. On the platform MeeGo in 2011 year was released two smartphones N950(prototype) and N9, details on the project page.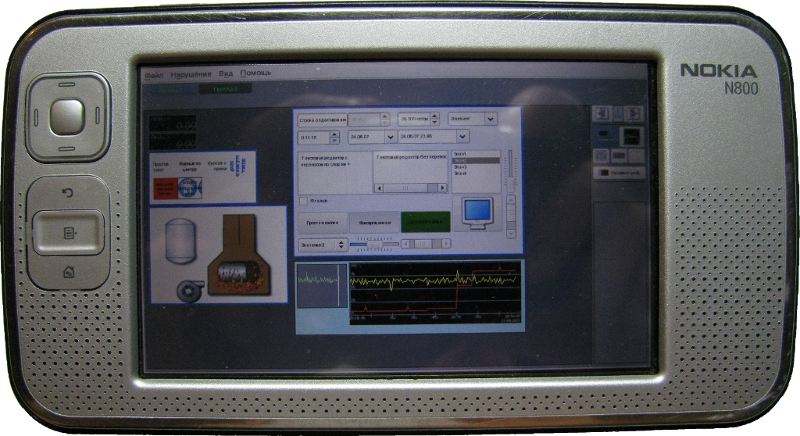
 SMH2Gi
Freely programmable panel controller "SMH2Gi" is a highly integrated computational control system with the iMx27 processor based on the ARM926EJ-S core of the All materials on building the programming environment with OpenSCADA and ready builds for the panel controller can be obtained at the link:
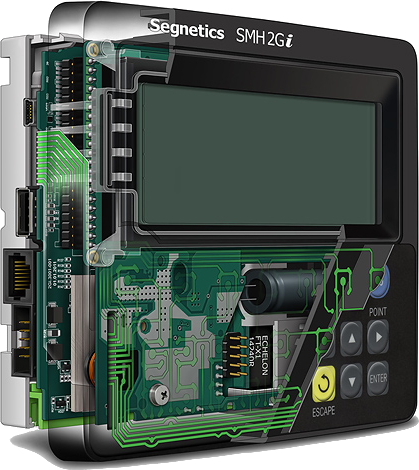
The panel controller is supplied by the equipment manufacturer with preinstalled environment based on Linux™, and its own runtime of the controller - "SMLogix". The role of OpenSCADA for this controller was seen as enhanced programming environment of the controller, integrated and programmed from the top level station on the basis of OpenSCADA. To preserve the possibility of visualization and control of data obtained in OpenSCADA on the integrated display, while minimizing the effort required for the adaptation, it was decided to save the original runtime environment "SMLogix" for the task of data visualization on the internal display, and to transmit data to/from it via a local ModBus/TCP connection. Afterwards, to optimize certain tasks, there created a module of data source to OpenSCADA DAQ.SMH2Gi with functions for direct SMH2Gi modules MC and MR acquisition, and also for variables exchange with process "logix", by the shared memory.
To build the original software environment the developer used previously discussed tools PTXDist of version 1.99.12. It was not necessary to build ToolChain, guessing the profile used to build the original software environment, because full building environment is available at the manufacturer's web site, packaged up as the Linux image for the VMWare virtual machine. The ready ToolChain profile was obtained from this image gcc-4.3.2-glibc-2.8-binutils-2.18-kernel-2.6.27-sanitized. Since it was not required to build the full RFS, it was decided to build OpenSCADA, using the ready ToolChain, separately. To build OpenSCADA the following libraries were previously built: "pcre-8.12" and "sqlite-3.7.6.2". Later, under building modules UI.WebCfgD and UI.WebVision
As a result, the archive of OpenSCADA assembling was formed, which can be loaded to the panel PC SMH2Gi and unpacked there. The resulting OpenSCADA software environment is configured to start automatically when you start the controller through init-script "/etc/init.d/openscada". OpenSCADA assembling was successfully launched.
With regard to the software environment of the panel controller SMH2Gi in general it is necessary to make some remarks. The controller uses the Linux 2.6.29 kernel with the hard real-time extension that allows you to hold periodical intervals up to 100 microseconds. In addition, all critical system threads run with the real time planning management policy. In this case, although the processor does not have a math coprocessor, emulation is performed optimally in the form of SoftVFP. All this makes it possible for OpenSCADA to perform highly determinate control tasks at regular intervals up to 100 microseconds and with an acceptable computational performance.
 AS-9260
Board AS-9260 is controller based on chip AT91RM9260, core ARM9(ARMv7), with peripheral devices set. The board targeted for development (maketing) projects based on microcontrollers with core ARM926EJ-S production by corporation Atmel, also that can be used for master controller of the target system.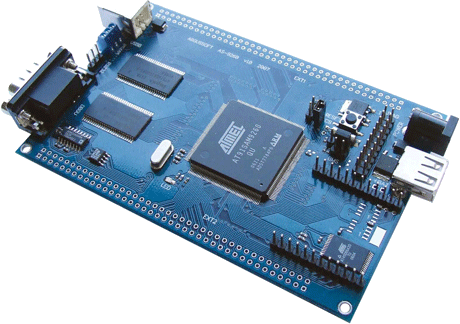
To the board placed sockets USB2.0 (1 Host, 1 Device, Full-speed, 12Mb/s), DBGU, RS-232, RS-485, two 12-pins sockets for placing Ethernet 10/100 Mbps interface module, besides that have place for set two 80-pins sockets type PLD-80 for connect external modules with additional interfaces.
The boards AS-9260 peripheral with processor
- sockets for interface USB type A and B;
- socket DRB-9 for interface DBGU (RS-232);
- socket PLS-3 for addition interface RS-232;
- socket PLD-20 for connect JTAG-emulator (ATSAM-ICE, AS-JTAG);
- chip ROM series DataFlash AT45DB642D-TU (case TSOP28);
- 2 chips SDRAM total capacity 32 or 64 MB;
- socket for external module Ethernet PHY connection.
Loader and kernel you can be found here
The flash will format to FS EXT2 and to it will write RootFS Debian Lenny. Run the system and configure the internet connection nano /etc/network/interfaces:
Into /etc/inittab let's set autologin:
Set repository for updating, into /etc/apt/sources.list
After upgrade let's download OpenSCADA sources and resolve dependencies. Natively compile SCADA fails by lack of memory. Some from the situation resolving solutions are next:
- Build image of RootFS:
- Start
 QEMU with RootFS image:
- Compile with next configuration:
- Write image with SCADA back to flash.
- Load and use.
The described method is far not the best then working to improve it. Similarly SCADA is installed to board AS-9200 with processor AT91RM9200.
 Raspberry Pi, Pi2, Pi3;
  OrangePi Zero
"Raspberry Pi®" is a singleboard computer created for charity purposes. Designed to teach basic computer science in schools, positioned as a low-cost solution for novice developers. Developed by "Raspberry Pi Foundation". First board of Raspberry Pi was got to assembling and adaption of OpenSCADA from Maxim Lysenko. The board Raspberry Pi2 was purchased for tasks of OpenSCADA and adapting it to work with generic buses like I2c, SPI, 1Wire with different sensors on its. The board Raspberry Pi3 was purchased and sponsored by 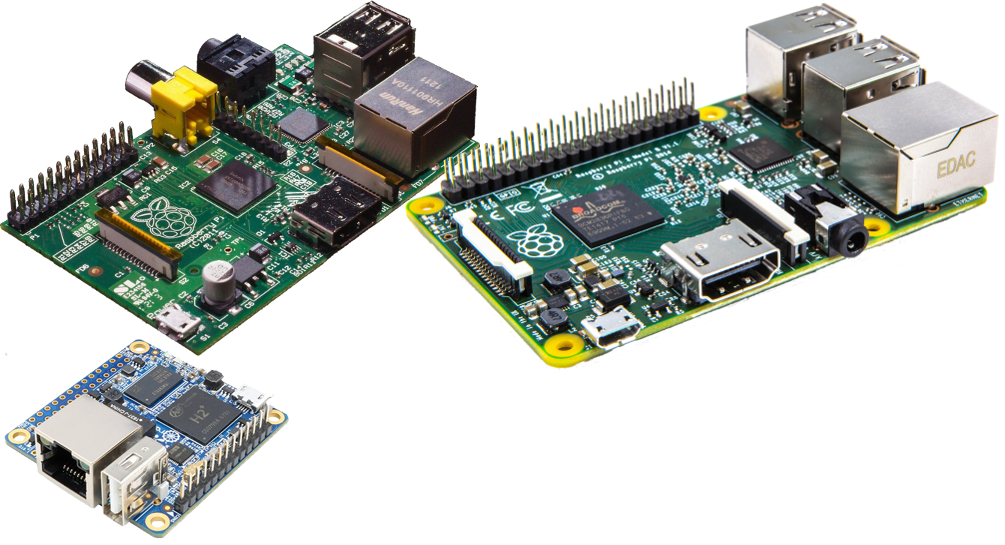
The board has features:
| Parameters: | Raspberry Pi | Raspberry Pi2 | Raspberry Pi3 | Orange Pi Zero |
| Hardware platform: | ARM11 (ARMv6) | ARMv7 | Cortex A53 (ARMv8) | Cortex-A7 (ARMv7) |
| Central processor: | Broadcom BCM2835, 700 MHz ("turbo-mode" up to 1GHz) | Broadcom BCM2836, 900 MHz, 4 Cores | Broadcom BCM2837 64bit, 1.2GHz, 4 Cores | H2 Cortex-A7 H.265/HEVC 1080P, 1.2GHz, 4 Cores |
| Memory: | 256/512 MB, integrated to CPU | 512 Mb or 1Gb, integrated to CPU | 1Gb, integrated to CPU | 256MB/512MB DDR3 SDRAM |
| Solid memory: | flash card MMC | flash card MicroSD | flash card MicroSD | µSD, optional SPI NOR Flash on board |
| Video subsystem: | integrated video core Broadcom | integrated video core Broadcom | integrated video core Broadcom | Mali400MP2 GPU @600MHz |
| Audio subsystem: | integrated to CPU | |||
| Electrical power: | microUSB, 5V, from 700 mA | microUSB, 5V, from 700 mA | microUSB, 5V, up to 2.4A | DC 5V DC-IN via µUSB or pin headers or PoE |
| Interfaces: | 2xUSB, Ethernet 10/100M, HDMI, video RCA, Stereo Jack 3.5 mm, UART, JTAG, SPI, I2C, DSI, CSI | 4xUSB, Ethernet 10/100M, HDMI, video RCA, Stereo Jack 3.5 mm, UART, SPI, I2C, DSI, CSI | 4xUSB, Ethernet 10/100M, WiFi 802.11 b/g/n, Bluetooth 4.1 LE, HDMI, video RCA, Stereo Jack 3.5 mm, UART, SPI, I2C, DSI, CSI | 3xUSB Host, 1xUSB OTG, Ethernet 10/100M POE, WiFi 802.11 b/g/n, TV out, microphone, stereo line-out, 3xUART, 2xSPI, 2xI2C |
| Weight: | 45 g. | 45 g. | 45 g. | 26 g. |
| Size: | 85.6 × 53.98 × 17 mm | 85.6 × 53.98 × 17 mm | 85.6 × 53.98 × 17 mm | 48 × 46 × 17 mm |
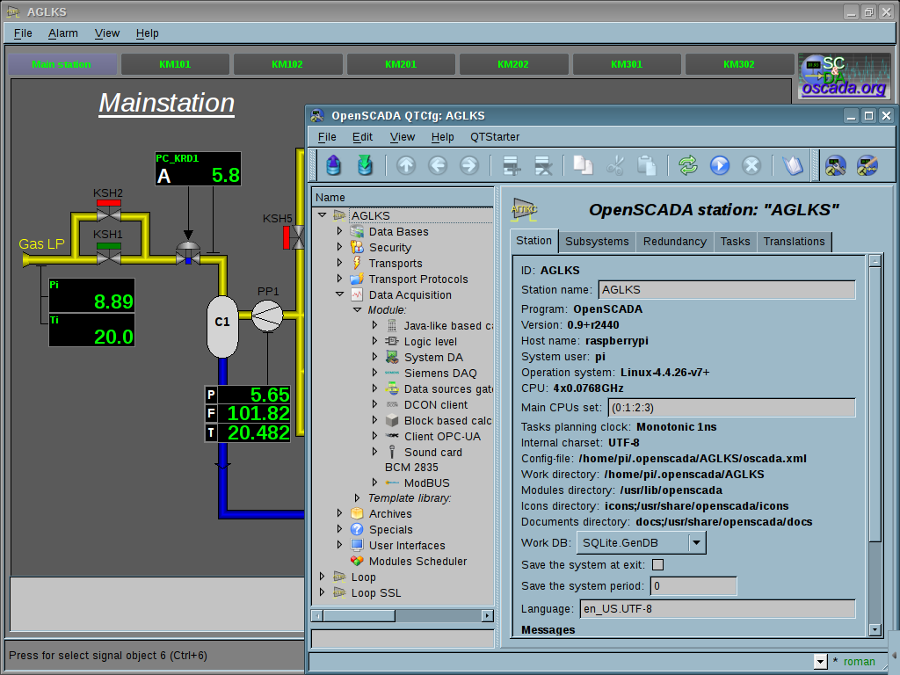
Raspberry Pi
For working the board used special distributive
Graphical desktop environment into selected distributive built on LXDE 0.5.5, displayed in full resolution of the display through HDMI, or in resolution 640x480 through composite video-output. OpenSCADA successfully have started and have worked into graphical mode, but its performance insufficient for normal dynamic models of OpenSCADA execution.
Raspberry Pi 2 and 3
For working with the boards there also used a special distributive
The typical graphical desktop environment into the selected distributive built on LXDE 0.5.5 (Wheezy) and 6 (Jessie) but it's replaced to
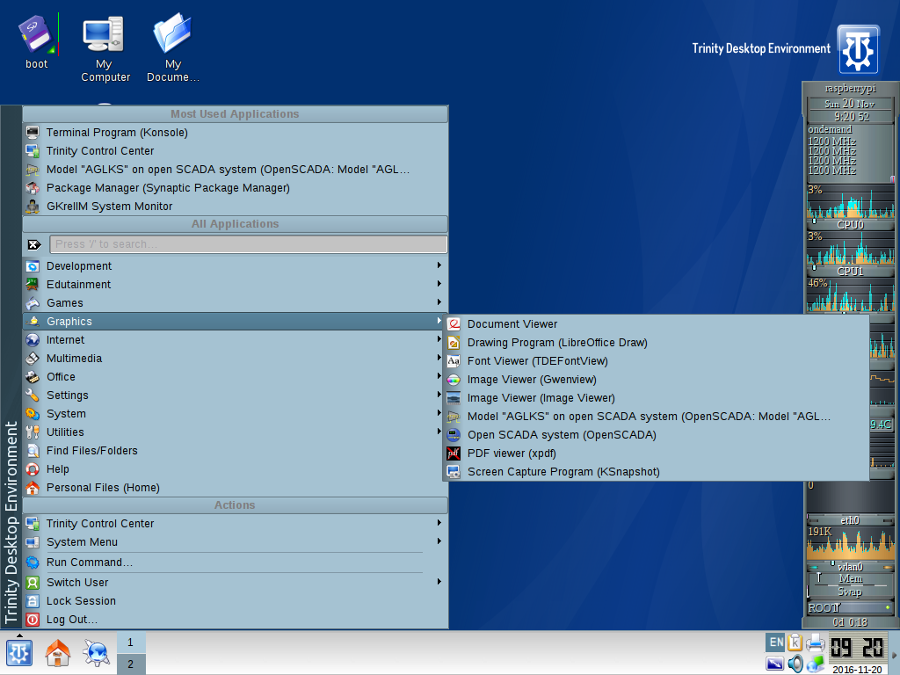
For more free handling to the board was connected a WiFi adapter and on RPi3 it presents already.
To allow for operations with GPIO directly in OpenSCADA there was created a module DAQ.BCM2835 based on the library
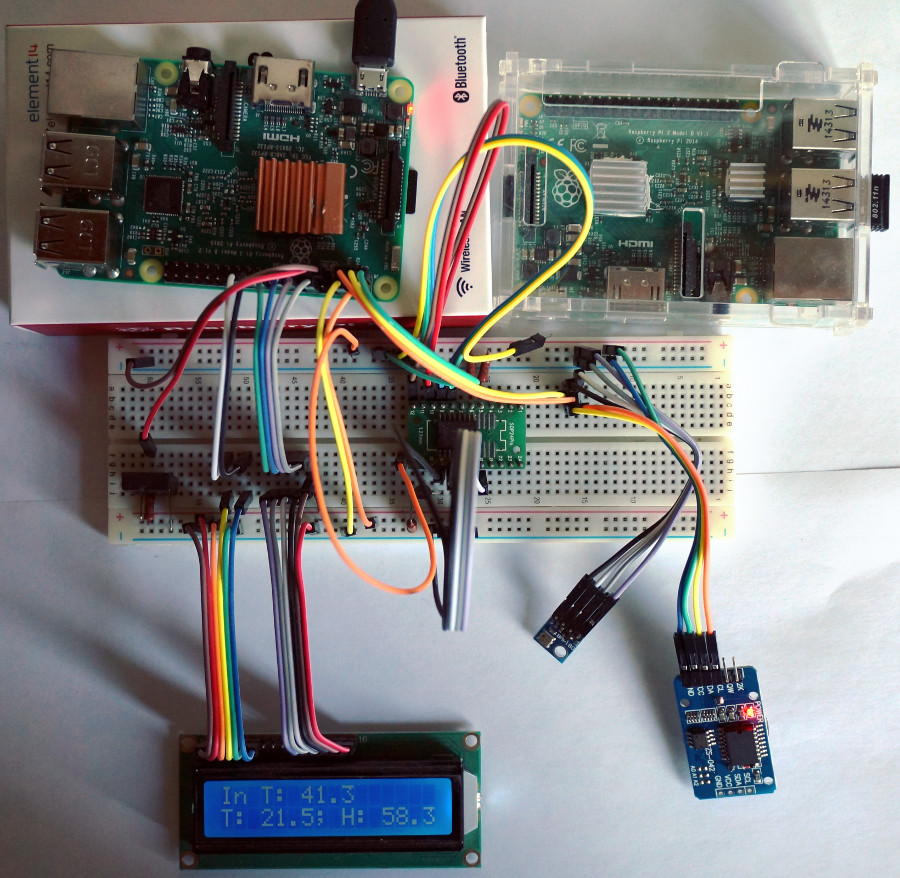
To the board there was connected a 16x2 text display 1602A and a program like to the original Python one was wrote into OpenSCADA by using the static functions of the module DAQ.BCM2835. As a result the program works fine and some faster to the Python original one.
To the board there were directly connected sensors DHT 11 and AM2303 (humidity and temperature) and a program like to the original Python program's C-language driver part was wrote into OpenSCADA by using the static functions of module DAQ.BCM2835.
To allow creation derivative DAQ templates with their configuration the dynamic linking to static external functions was added into DAQ.JavaLikeCakc, like this:
To allow operation in OpenSCADA with devices on bus I2C the output transport "Serial" was adapted to the bus by selection the bus and a slave device's address (first byte of the sequence) set by IO control command I2C_SLAVE. In this way now to OpenSCADA there were connected:
- The 8-bit A/D and D/A converter chip PCF8591. Through the chip PCF8591 were connected sensors LM35 and LM335.
- The 8DIO converter chip PCF8574, which also adapted and tested for connection to 1602A.
- The barometric pressure/temperature/altitude Sensor BMP180.
- The memory chips AT24CXX by calls through the proper protocol.
The tracing task of the work out opened
Orange Pi Zero
For working with the board there used a special distributive
The board provides more low level buses (3xUART, 2xSPI, 2xI2C), despite its small size, and restricted GPIO in 16 pins which mostly used by the buses. The buses are standard but GPIO are some specific ones for which we need implement special support into the presented module DAQ.BCM2835 making it more unified one. Then there planed next tasks:
- connect a device to the I2C bus;
- connect a device to the Serial bus,
- try to adapt 1Wire (DS9097) to the Serial buses;
- the specific GPIO support implement for OpenSCADA;
- WiFi driver fix/update.
 Asus Nexus 7 II
"Asus Nexus 7 II" — tablet computer of 2013 year edition with four-cores ARM-processor and sensor screen 7", released in conjunction of
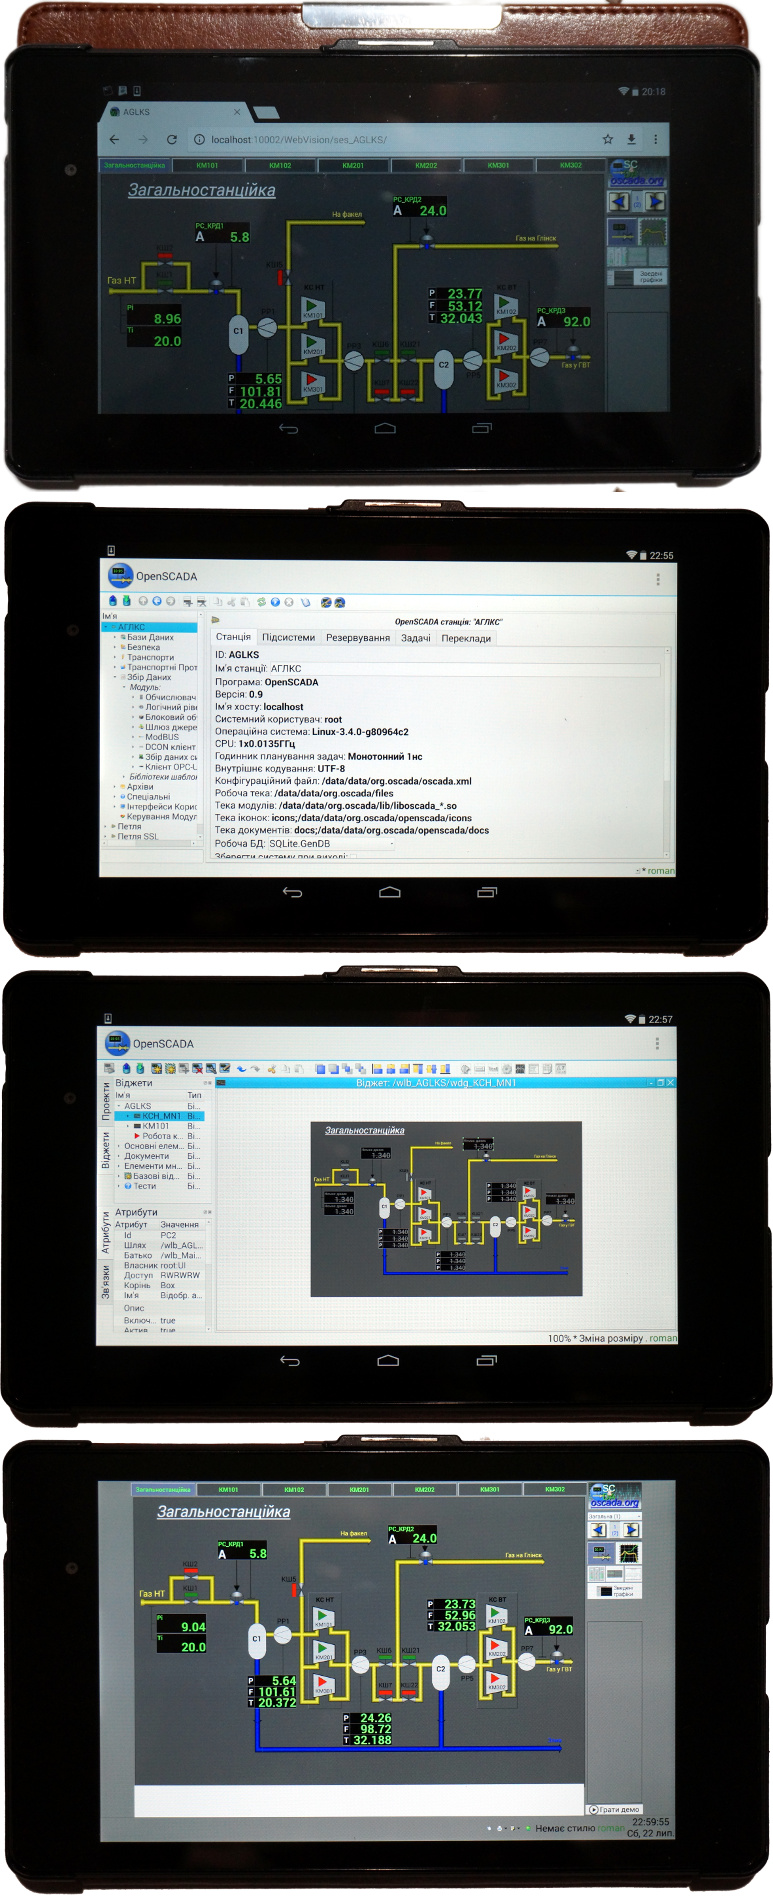
Image. OpenSCADA in Web and Qt5 for the native building.
Key specification of the tablet:
| Hardware platform: | ARM Cortex-A15 [ARMv7] |
| Central processor: | Four-core Qualcomm Snapdragon APQ8064-1AA 1500 MHz |
| Operational memory: | 2 GiB DDR3 |
| Permanent memory: | 32 GiB |
| Video subsystem: | 400 MHz quad-core Adreno 320 |
| Screen: | IPS, 1920x1200 px (323 ppi) |
The tracing task of the work out opened
Assembling and starting OpenSCADA into the environment of OS Android
Installing of full-featured OS Linux and OpenSCADA starting
For different OS installing you need to unlock the loader and for original Android saving you need ensure multiboot.
The loader unlock and ROOT, from a Linux environment:
- Enable the debug mode of Android: "Configuration" -> "About the device", five times click into item "Building number".
- Set debug through USB: "Configuration" -> "Developers parameters", set proper property.
- Install the utility "adb" (Android Debug Bridge).
- Check for connection to the tablet: connect USB-cable to PC, call command "$ adb devices".
- Unlock the device:
- Enable the tablet with connection to PC by the USB-cable and holding by buttons "Power" and "Sound lower" up to the bootloader screen appear.
- Check for the boot-loader visibility: "$ fastboot devices".
- Unlock: "$ fastboot oem unlock".
- Load and flash "TWRP recovery": load
 here, then flash it by command "$ fastboot flash recovery /Path-to-TWRP.img"
- Enter to the "Recovery" mode of the loader and provide access ROOT: select "Reboot" -> "Recovery" -> "ROOT", then "Reboot" -> "Sytem".
- Next, installation "SuperSU" for you will be proposed.
To provide the multiboot let install "MultiROM Manager" from "Play Market".